
Flowers on cards are a big trend these days, so today I’ll be showing you how to make some of your own.
TISSUE FLOWERS:
This idea is not my own. I saw them on Dawn McVey’s blog a few years back and loved making them so I thought I’d share how to make them with you.
Tissue flowers are very easy to assemble and make a wonderful statement on your card. So hang on to that tissue paper you get in your gifts or with your flowers J It doesn’t matter if it’s wrinkled as the wrinkles add wonderful texture to your flower!
The supplies you will need to make a tissue flower are as follows:
- A scalloped circle punch (or scalloped circle Nesties)
- Tissue Paper
- A brad
Take your tissue paper and fold it over so it is eight (8) layers deep.
Then punch through all eight layers at once with your scalloped punch, making sure to keep the layers together once you have punched them out. If you don’t get a clean punch, don’t worry, a few torn edges add a wonderful shabby feel to your flower! 
With a push pin or paper piercing tool, make a hole in the middle of the stack of tissue flowers and insert and fasten a brad. 
Starting with the first tissue layer, scrunch it up around the brad. Then take the second tissue layer and scrunch it around the first one. Continue the process until all the layers have been scrunched.
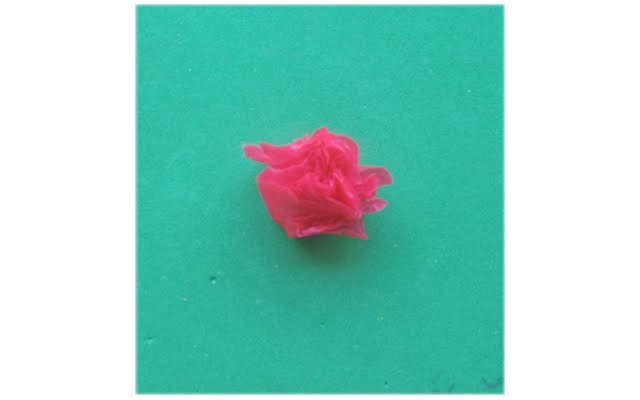
Then all you need to do is gently play with the layers until you get the desired “poofiness” and shape to your flower. A paper piercing tool or toothpick work great for this part.

If you want to make a flatter flower you can add a decorative button or brad to the middle.
Here’s a quick card I made using a tissue flower on it.

PAPER FLOWERS:
You can also use this technique to make paper and cardstock flowers. Simply punch out eight scalloped circles. If you are using white cardstock a nice option is to sponge the edges of all eight scalloped circles.
Then mist each circle with water and individually scrunch them up. Them ore you scrunch them the more you soften then.
Then gently unwrap each one and stack them up on top of each other, and adhere them with a brad in the center as you did with the tissue flowers.
Just like the tissue flower, begin by scrunching the first layer to the middle around the brad and continue to do the same with each consecutive layer.
Once completed, gently open the flower until you achieve its desired look and set aside for the paper to dry. You can spray some glimmer mist on it or the like at this point if you like. Once the flower is dry it will hold its shape wonderfully.


Awesome - these looks great! Thanks Holly!!
ReplyDeleteAbsolutely love this! Thanks for the great tutorial. I'll be trying this for sure!
ReplyDelete